
15 Oct Your Ergonomics Checklist: Setting Up Your Home Desk for a Pain Free Back and Neck
Working from home has perks, but a poor desk setup can leave your back and neck aching by lunchtime. If your shoulders creep up to your ears, your lower back feels tight, or your eyes get sore, your workspace is likely out of tune.
Good ergonomics protects your spine, keeps muscles relaxed, and sharpens focus. This guide walks you through a simple checklist you can apply today. Small tweaks add up. With the right chair height, desk fit, and screen position, you can work longer with less pain and more energy.
Let’s build a home desk that works with your body, not against it.
Choose the Right Chair and Desk for Comfort
A supportive chair and a well-sized desk set the foundation for comfort. Follow these chair and desk basics to reduce strain right away. For deeper guidance, see the Mayo Clinic office ergonomics guide.
Adjust Your Chair for Proper Support
- Chair height: Set it so your feet rest flat on the floor. Use a firm footrest if your feet dangle. Your thighs should be parallel to the floor, with knees at or just below hip height.
- Back support: Adjust lumbar support to match the curve of your lower back. If your chair lacks support, use a small cushion or a rolled towel.
- Seat depth: You should have a gap roughly the width of three fingers between the seat edge and the back of your knees.
- Armrests: Set them just high enough to relax your shoulders. Your elbows should sit close to your body at about 90 degrees.
Quick self-check: Sit back so your spine is supported, shoulders relaxed, and feet grounded. If you feel the urge to slouch or perch on the edge, tweak your settings.
Benefits: Proper height and lumbar support reduce load on spinal discs, ease tension in your neck and shoulders, and help you sit upright without effort.
Set Up Your Desk Height and Space
- Desk height: When your chair is set, place your keyboard at elbow level. Your forearms should be parallel to the floor.
- Knee clearance: Keep space under the desk free. Aim for enough room to move your legs and shift position often.
- Edge comfort: If the desk edge presses into your wrists or forearms, add a soft edge protector or folded towel to reduce pressure.
What if your desk is too high or too low?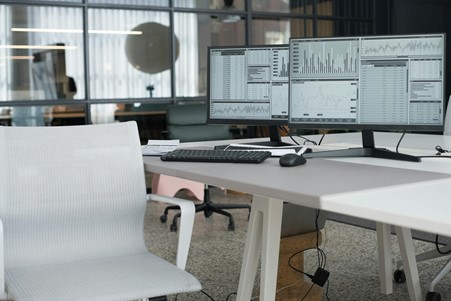
- Too high: Raise your chair, add a footrest, and use a keyboard tray if available.
- Too low: Add stable blocks under the desk legs, or switch to a taller table.
Clear space helps blood flow, reduces stiffness, and stops you from twisting your body to reach items.
Position Your Monitor, Keyboard, and Mouse Correctly
Your screen and input devices guide your posture. If they sit too high, low, or far away, your body follows. Set them right, and your neck and wrists will thank you. For a fast reference, this short 10-minute office ergonomics checklist covers the core steps.
Optimal Monitor Setup to Ease Neck Strain
- Distance: Place the monitor about an arm’s length away. Adjust based on text size so you are not squinting.
- Height: The top of the screen should sit at or just below eye level. You should look slightly down at the centre of the screen.
- Alignment: Keep the screen directly in front of you, not off to the side.
- Multi-screen use: Put the primary screen central. If you use two screens equally, line them up side by side and centre the seam to your nose.
- Reduce glare: Position lighting to the side of your screen. Close blinds or tilt the monitor to avoid reflections.
Common mistakes to avoid: screens set too low, laptops used flat on the desk, and monitors placed off-centre. If you use a laptop, add a stand and an external keyboard and mouse.
Benefits: Correct height stops chin poke and neck craning. Good distance reduces eye strain and headaches.
Keyboard and Mouse Placement for Wrist Health
- Level: Set the keyboard at elbow height, with wrists straight and hands floating above the keys.
- Angle: Keep the keyboard flat or with a slight negative tilt to avoid wrist extension.
- Mouse: Place it close, at the same height as the keyboard. Keep your elbow near your side.
- Technique: Use a light touch. Avoid pressing hard on keys or gripping the mouse tightly.
- Alternate sides: If comfortable, occasionally switch the mouse to the other hand to reduce repetitive load.
These habits reduce pressure on tendons and nerves, lowering the risk of wrist pain and numbness.
Build Healthy Daily Habits at Your Desk
Even the best setup cannot help if you sit still for hours. Movement resets your posture, boosts circulation, and relaxes tight muscles. Use a simple routine you can keep. If you like checklists, try the NIH’s practical workstation ergonomics self assessment.
Take Regular Breaks and Stretch
- Timing: Stand up at least every 50 to 60 minutes. Set a timer.
- Micro-moves: Every 20 minutes, roll your shoulders, rotate wrists, and look away from the screen for 20 seconds.
- Easy stretches:
- Shoulder rolls, 5 each way.
- Chin tucks, 5 slow reps.
- Seated spinal twist, gentle and pain free.
- Chest opener in a doorway, 20 to 30 seconds.
Think of these as oil for your joints. Small, regular moves keep you loose and reduce stiffness.
Maintain Posture Throughout the Day
- Upright cues: Sit with your hips back in the chair, ribs stacked over pelvis, and head balanced over your shoulders.
- Screen check: If you are leaning forward, raise the monitor or zoom in.
- Feet: Keep both feet grounded to stop tilting your pelvis.
- Phone use: Avoid cradling the phone between shoulder and ear. Use a headset when you can.
Benefits: Better posture reduces strain on spinal discs and neck muscles, improves breathing, and helps you focus longer without fatigue.
Quick Reference Checklist
- Chair height: Feet flat, thighs parallel, knees near hip height.
- Lumbar support: Natural curve supported, shoulders relaxed.
- Desk height: Keyboard at elbow level, edge padded if needed.
- Monitor: Arm’s length away, top at eye level, centred.
- Keyboard and mouse: Close, same height, wrists straight, light touch.
- Lighting: Side lighting to reduce glare.
- Habits: Move every hour, stretch daily, keep posture cues in sight.
Conclusion
A spine-friendly desk starts with small, smart changes. Set your chair so your feet ground easily, match your desk to your elbows, lift your screen to eye level, and keep your keyboard and mouse close. Add short breaks and simple stretches, and your back and neck will feel the difference.
Ready for tailored advice? Book a consultation with a practitioner at the clinic. Your body should feel supported while you work. Start with one change today and build a routine that keeps you comfortable, focused, and pain free.
It is important to note that the specific interventions and strategies employed by any medical practitioner will depend on the individual’s unique needs. Each practitioner in a care team will work collaboratively with each other to provide comprehensive care and support for the individual.
If there is a part of your condition or injury that you are struggling to understand, be sure to seek clarification with your medical professional. None of the information in this article is a replacement for proper medical advice. Always seek advice from your trusted medical professional regarding your health and/or medical conditions.